How to configure Single Sign-On for Remote Desktop Services
Single Sign-On is an authentication mechanism that makes it possible to automatically log on to servers and web pages within a Windows domain with the username and password to log on to Windows with.
This article describes how this is configured on both the client and server-side.
Single sign-on (hereinafter “SSO”) is an authentication mechanism that makes it possible to automatically log on to servers and web pages within a Windows domain with the username and password to log on to Windows with. When you are logged on a domain client with a domain user, you get issued a so-called Kerberos ticket. When SSO is enabled it is used to log on to internal resources such as a Sharepoint portal, or Remote Desktop sessions to a server configured with Remote Desktop Services. Remote Desktop Services was introduced in Windows Server 2008 R2, which was launched along with Windows 7 The earlier and more familiar name of a server set up as a so-called Remote Desktop Session Host’s “terminal server”. A Remote Desktop Session Host server can accept logins from many simultaneous users, where users can access published applications.
Read more about SSO for Windows Server 2008 and Windows Server 2008 R2 .
On the client side is SSO available for Windows XP with SP3, Windows Vista and Windows 7
Configuring SSO on the server side
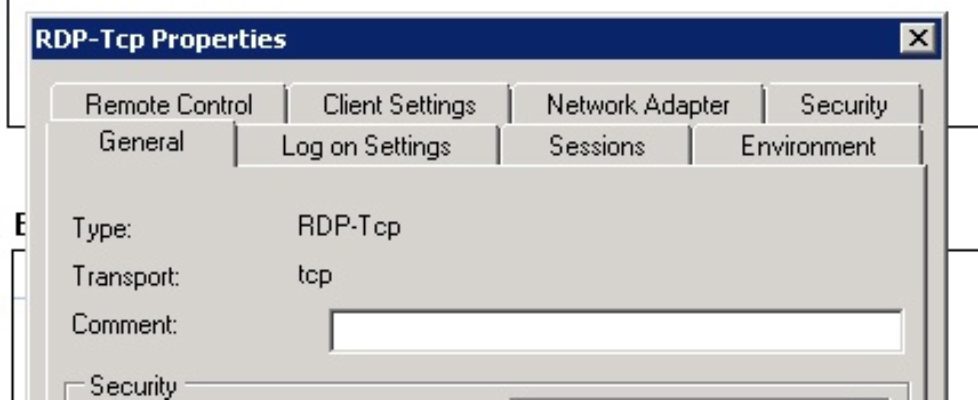
To configure SSO on the server side (Windows Server 2008 Terminal Services or Windows Server 2008 R2 Remote Desktop Services), set the “security layer” on “RDP-tcp” list successor to either “Negotiate” or “SSL (TLS 1.0) “:
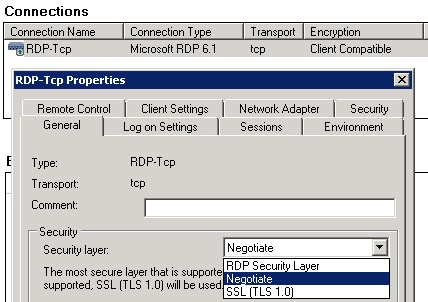
Best practice is to configure this in a single Group Policy setting for all Remote Desktop Session Host servers in the domain:
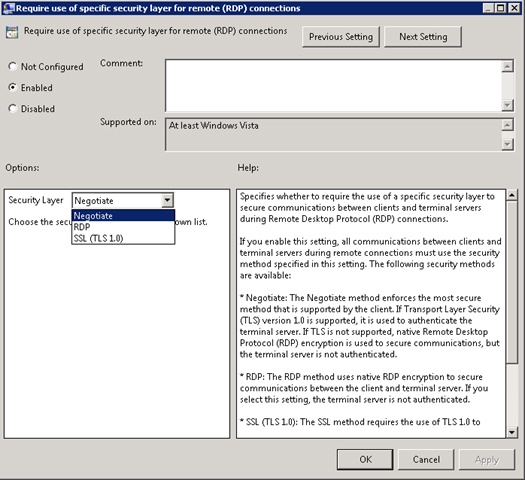
Group Policy setting for this is found under Computer Configuration-> Policies-> Administrative templates-> Windows Components> Terminal Services-> Terminal Server> Security.
Configuring SSO on the client side
Using a common Group Policy setting is also best practice to set up the necessary SSO settings on the client side.
The setting must be set up called “Allow Delegating Default Credentials” and located under Computer Configuration-> Policies-> System-> Credentials Delegation:

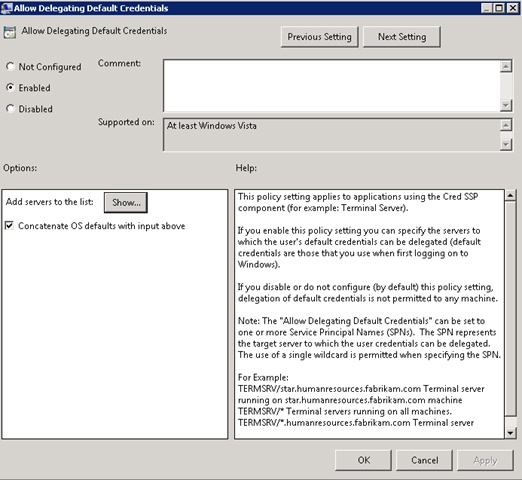
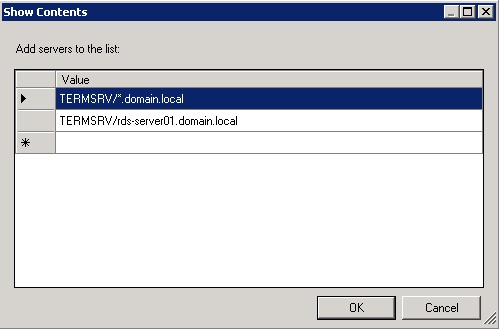
Enable “Allow Delegating Default Credentials”, press the “Show” button and Specify whether the domain name in the format TERMSRV / *. domainname.local, or specify specific servers SSO shall be permitted to:
The next step is to create an RDP file (configuration file for Remote Desktop client mstsc.exe). Start the client from Start-> Run-> mstsc.exe and configure the server name and other settings for the connection, such as mapping of local printers and disks.
Once this is done, open the RDP file in Notepad and add the following line at the bottom of the RDP file:
enablecredsspsupport: i: 1
This will enable SSO for this RDP file.
It is also recommended to add a digital signature to the RDP file to prove who the RDP file is made of, and prevent file can be used if it made unauthorized changes to the signing must be done with a so-called “Code Signing” certificate that the clients trust. This can be done with the built-in tool rdpsign.exe :

Example of signing:
![]()
When the RDP file is signed, the following line is added to the bottom of the RDP file:
Signature: s: AXQBAAEAAADBCgAAMIIKvQ … … ….
Made the changes to the RDP file after signing the signature must be performed again.
For Windows Vista and Windows 7 client setup and deployment will now be finished when RDP file is published to the clients. This may be done manually, using login scripts or Group Policy (see further down the article).
For Windows XP clients, the following must be in place before the SSO can be used:
- Service Pack 3 must be installed
- The minimum version 6.0 of Remote Desktop client to be installed
- CredSSP Security Provider must be enabled
How CredSSP Security Provider is activated is described in this Knowledge Base article .
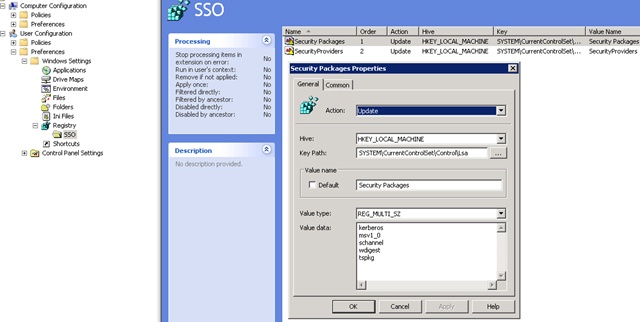
It’s recommended to deploy the appropriate registry settings with Group Policy Preferences:
RDP file can also be rolled out in the same way:
SSO can also be combined with the Remote Desktop Services Web Access . Remote Desktop Services team has written a blog post that describes setting up SSO in the RDS Web Access.
For those clients who are not members of the domain, such as home office / remote clients, the RDS Web Access, a possible solution. Users then log on the website for RD Web Access, and can log in on to a Remote Desktop Session Host with the same Kerberos ticket that was issued when they logged on the website with username and password.

