
Installing and Configuring Citrix XenApp 6.5
Citrix, How to, installation guide, Step-by-step guide for XenApp 6.5, Windows Server 2008 R2, XenApp, XenApp 6.5
This is a how to install Citrix XenApp 6.5 for Windows Server 2008 R2
Before installing XenApp, ensure that the prerequisite software and Windows roles described in the system requirements documentation are installed. After installing the prerequisites, restart the computer before installing XenApp. During a wizard-based installation, the installer automatically installs prerequisites but the XenApp installation might fail after the prerequisites are installed. If this occurs, restart the computer and begin installing XenApp again. I did experience that the prerequisite if not followed the right way, made problems with the installation of XA, so follow it!
Okay let’s begin, I assume that you have a Windows Server 2008 R2 freshly installed and updates are in place. Also, remember to make it a member of your domain!

The installer has been updated and looks even better than the XenApp 6 version. I have mounted the ISO file in Citrix XenServer 5.6 SP2. As in XenApp 6 the installer installs all the features you need including Remote Desktop Services. So, just install a basic Windows Server 2008 R2.
Hit Install XenApp Server
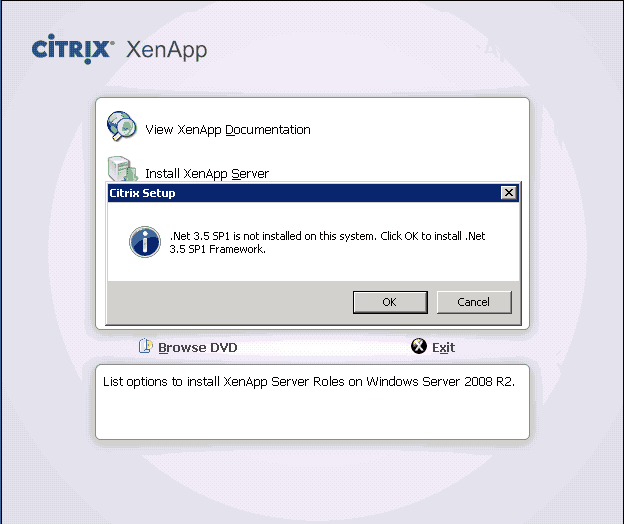
You will be prompted to Install .Net 3.5 SP1!
Hit the OK button

The XA 6.5 installer will now review your server, and when it finishes click on Add server roles
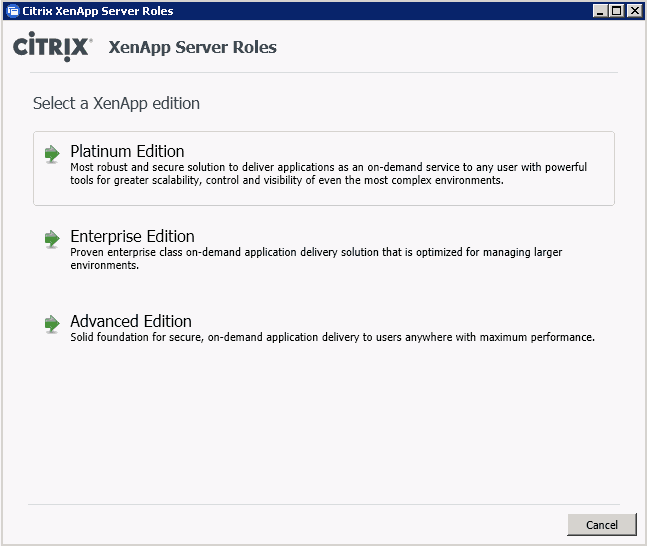
Choose your XenApp Edition. In this setup guide I will use Enterprise Edition.
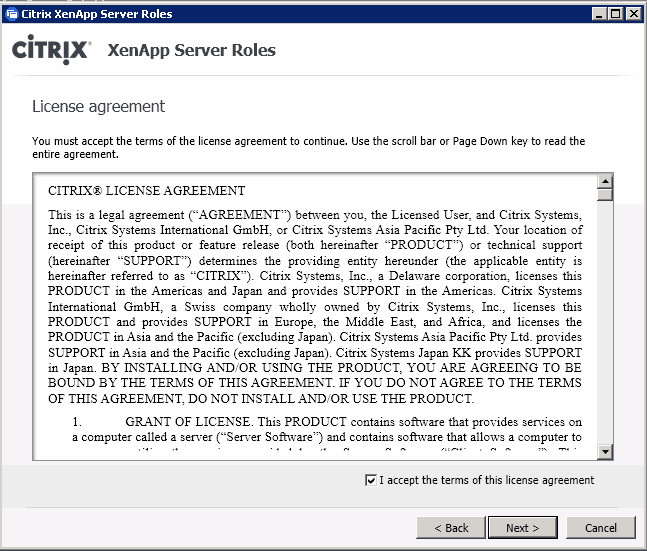
The usual Terms of License Agreement appears, click it and then go Next.
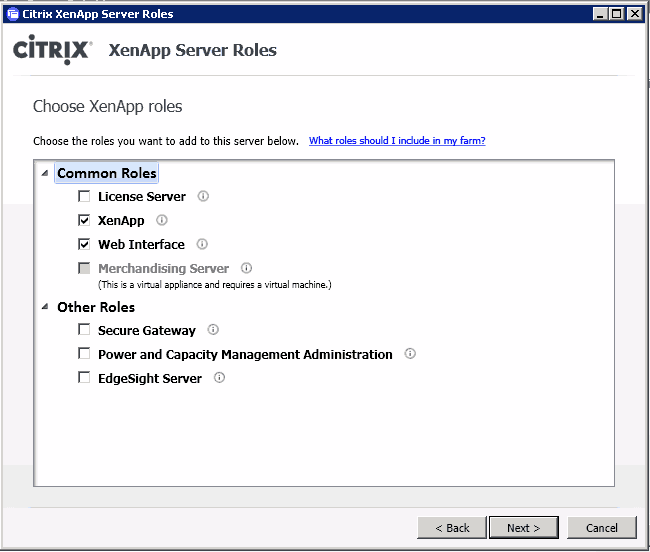
Choose which features you wish to install, this guide focuses on XenApp, and I’ll get back to the setup of Web Interface in a new guide next week.
When your options are selected click on Next.

Now you have the option to install some extra features. I’ve chosen the XML Service IIS Integration in this example
Click Next.
Hit Next!
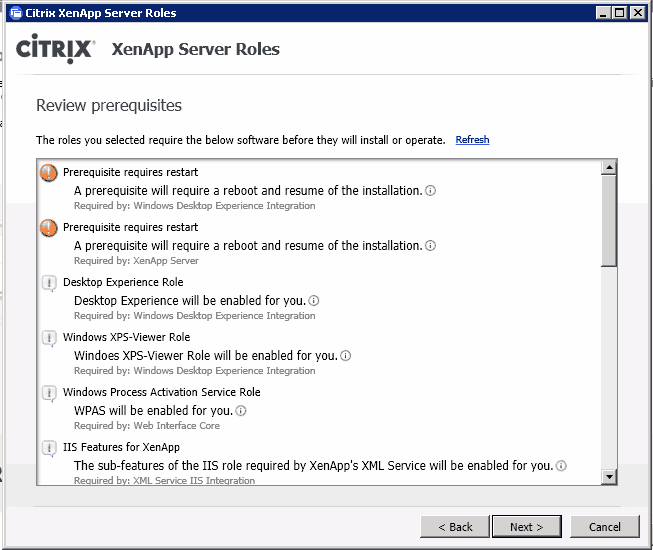
Next up is a summary of prerequisits needed to install XenApp XenApp 6.5 for Windows Server 2008 R2. Here you will se the new installer in action, you can hoover over the info signs for information on each instance. The installer will install all the required features for you.
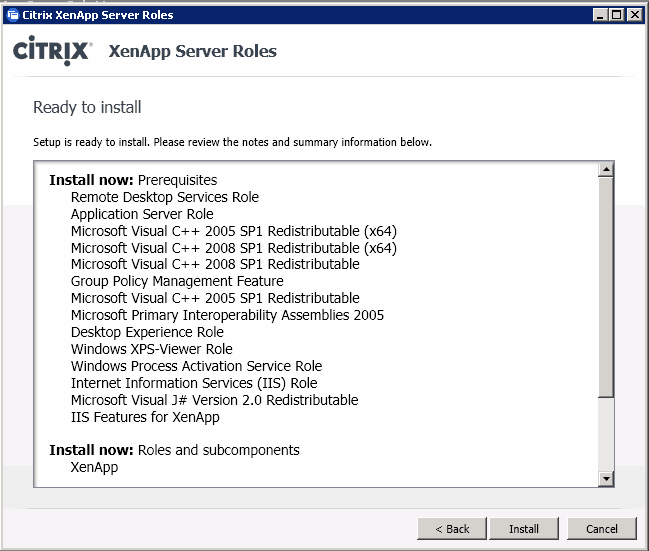
Click Install
Choose Finish
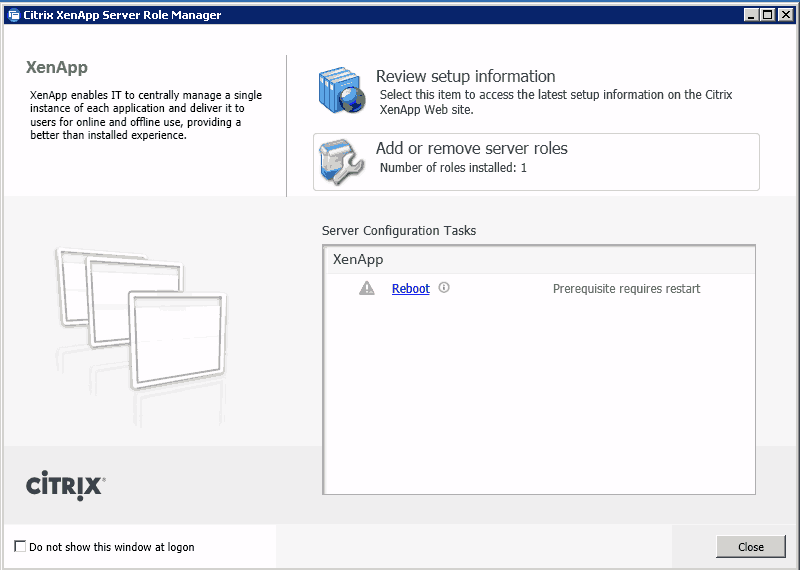
Click Reboot.
The server will now reboot!
After reboot, Click Resume Install to continue the installation of XenApp 6.5

Click Install
Review the installed components and click Finish.
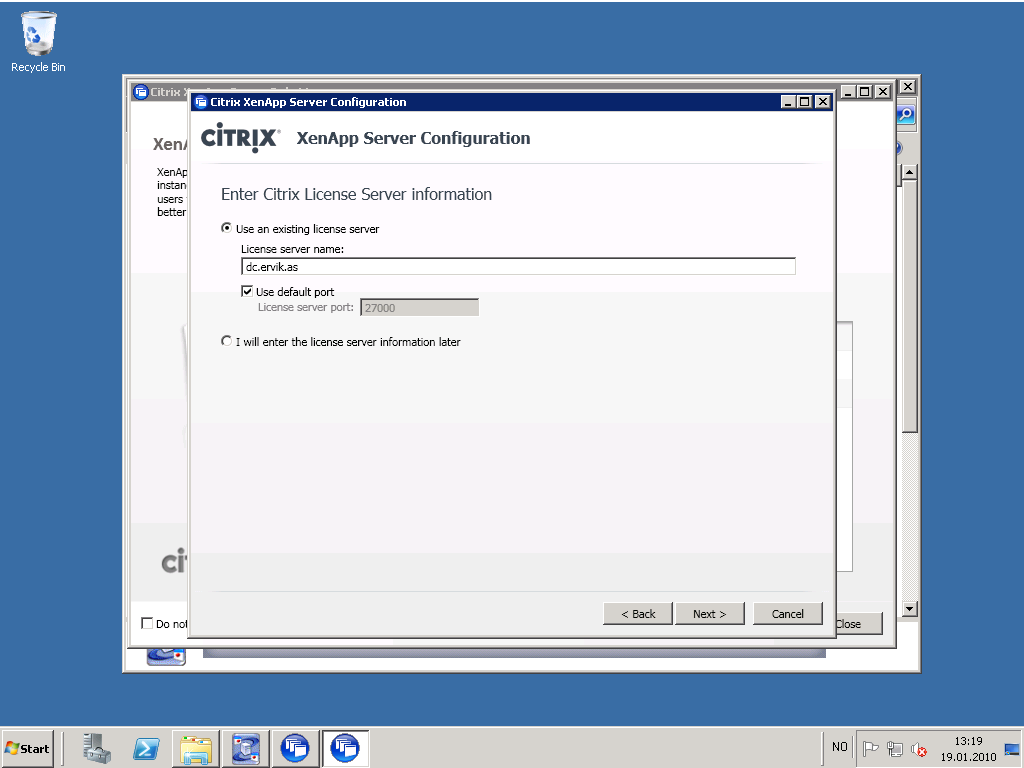
Click Specify Licensing
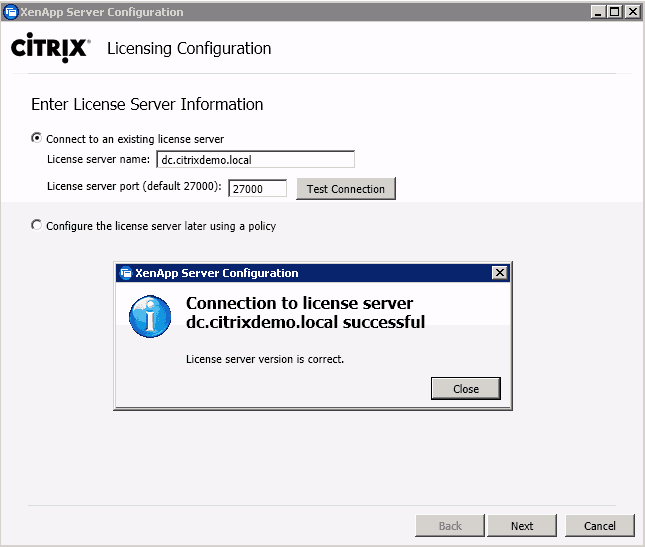
Enter the License server name and Test the Connection
Click Next

Note that you need to Configure the XenApp 6.5 server, I’ve choose to do so, but you can leave it and perform this task on a later stage.
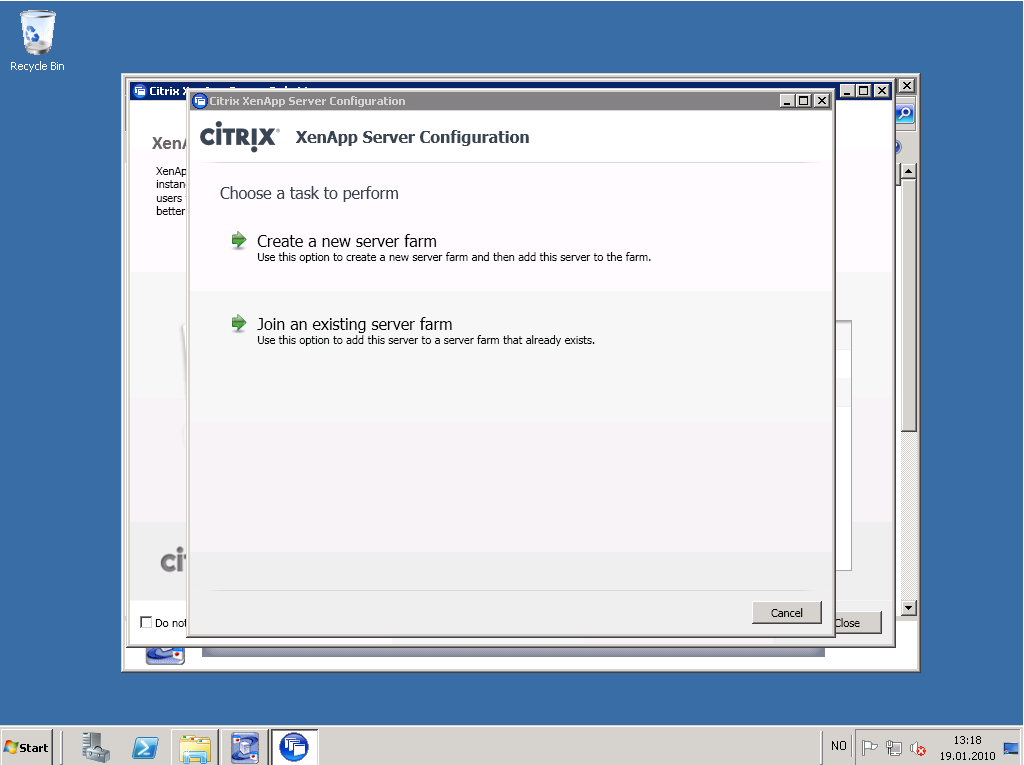
This guide will now do the basics. So, click on Configure
I’m going to create a new farm for this setup guide.
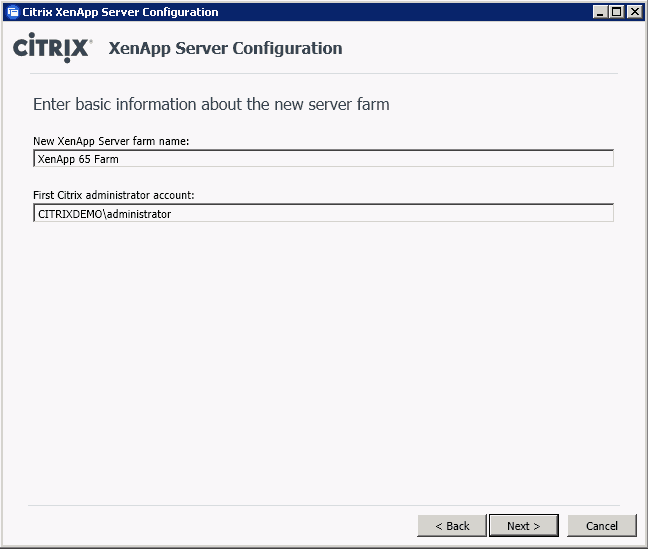
Enter a name for the new farm that you wish to create. The First Citrix admin account should be domain\administrator, if it’s not filled in, do so!
Click next
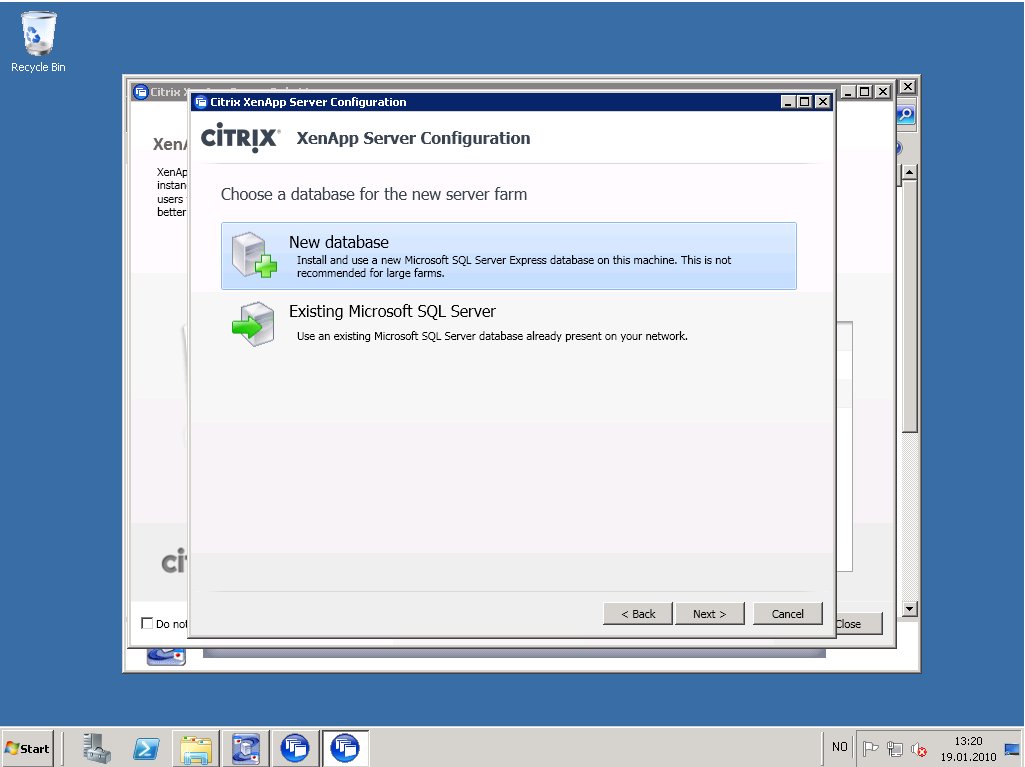
Now we shall configure the Database connection, if you have a existing Microsoft SQL Server then choose this option, if not and you are fine with just running the SQL Express version on the same server as we installed XenApp on, then please do.
Since I have an SQL Server, I’m going to choose this option, and Click Next.
Now enter your SQL Server name and you will also need to go to the SQL Server to create a new database. Mine is called XenApp6, call it what you like and enter the name under Database name.
Choose which type of authentication you are using, I’m using Integrated Windows authentication.
Click Next

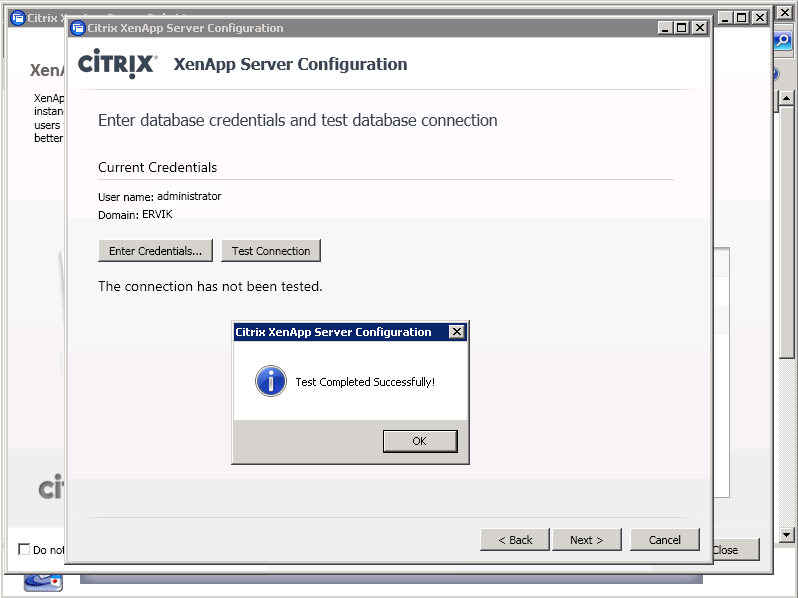
Now enter the Password for the administrator account and hit OK
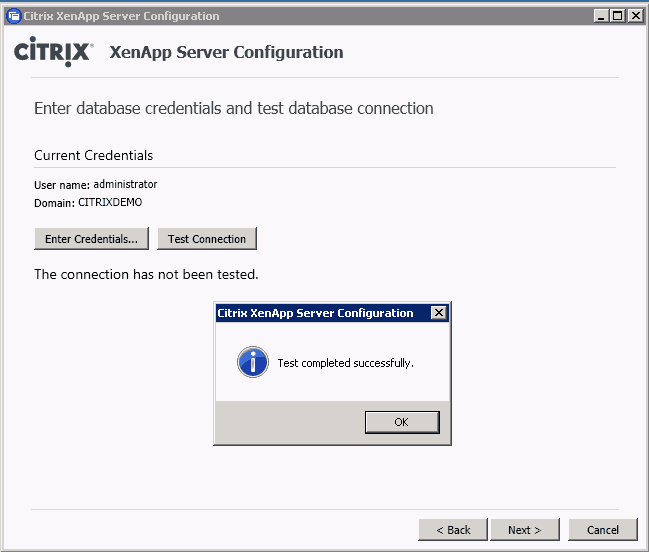
Now do a quick test to check the connection with the database server. When finished click Next.
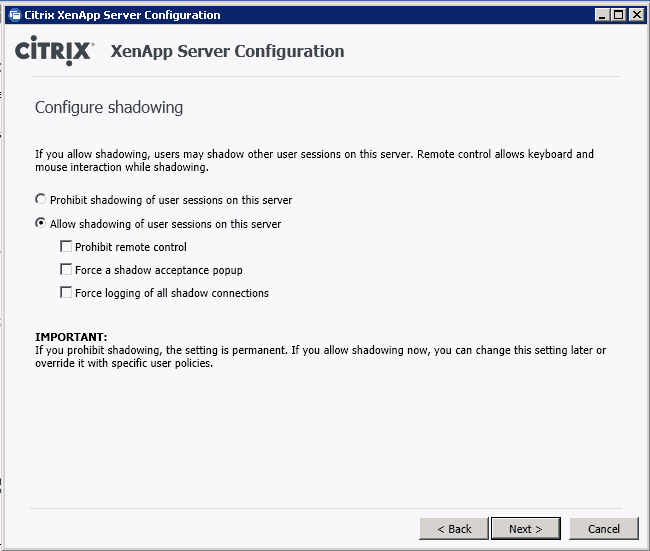
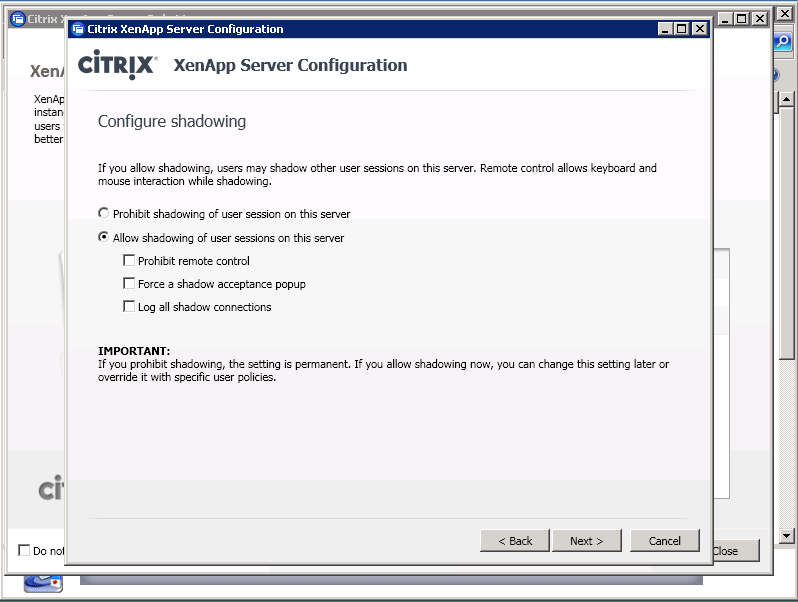
Now choose if you want to allow shadowing of users or not, I will allow it.
Click Next

Now review these 4 options on the left and as you can see I just for fun went with a Custom Zone Name for my new XenApp 6.5 for Windows Server 2008 R2. Click Next, when finished.
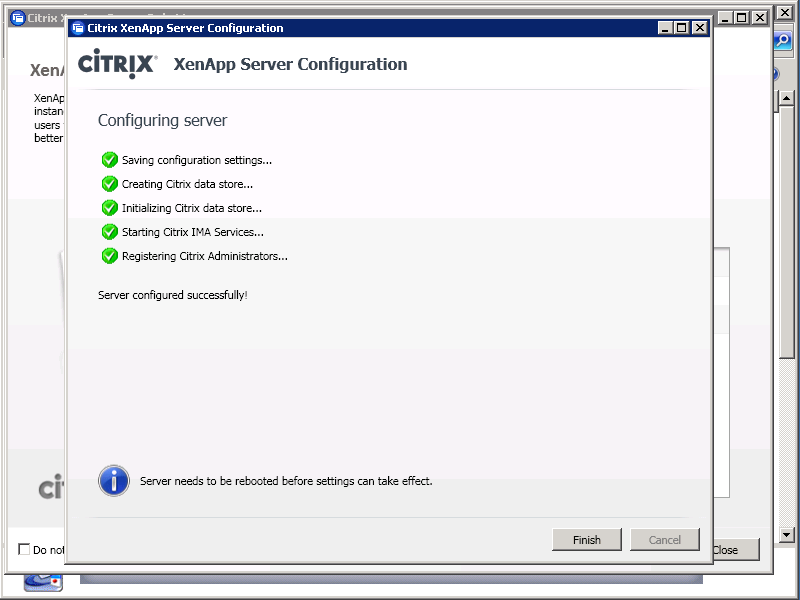
Next you will see a summary of the configurations that you are about to apply. Take a quick review and hit the Apply button when ready.

Sit back and relax for a few and when all “lights” are green and you get the message Server configured successfully! you are good 2 go, click Finish.
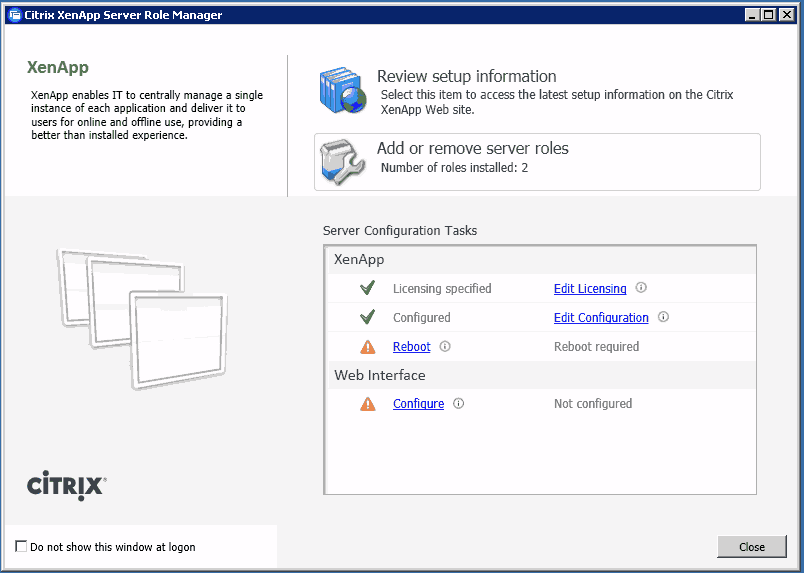
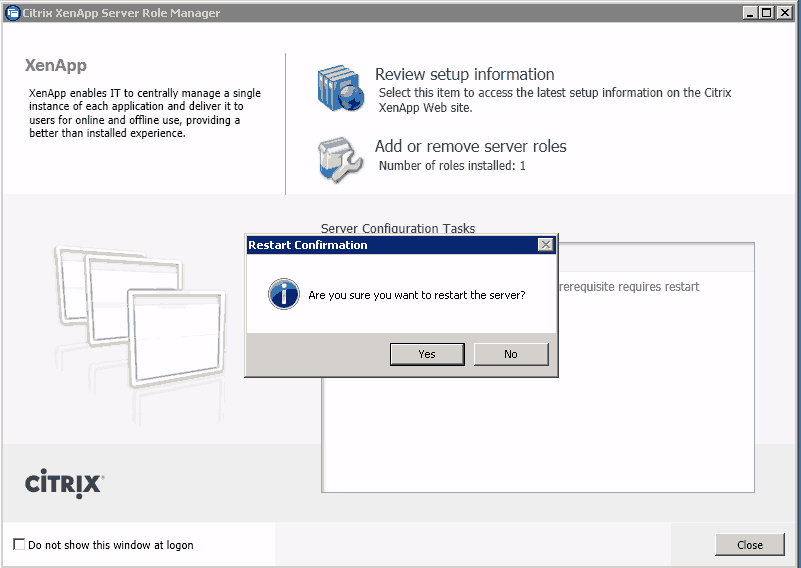
A Reboot is now required! Click on the Blue highlighted Reboot text to reboot the server.
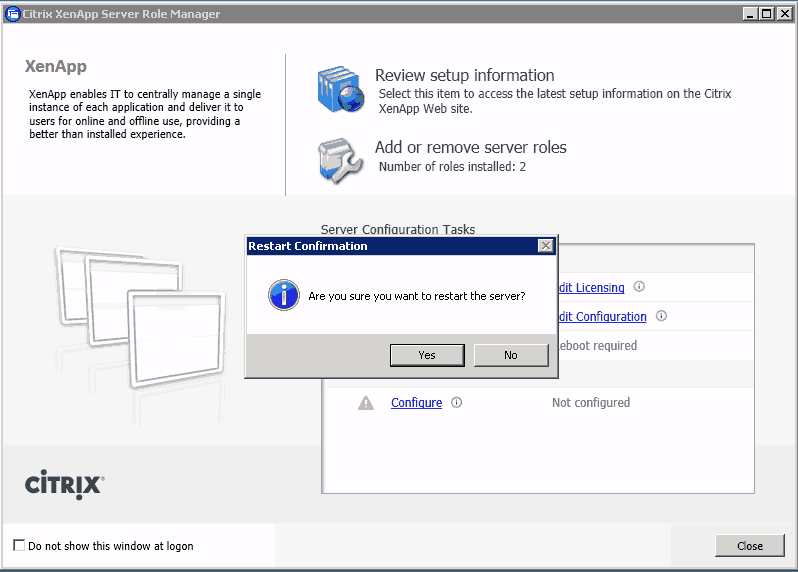
Click Yes to reboot!
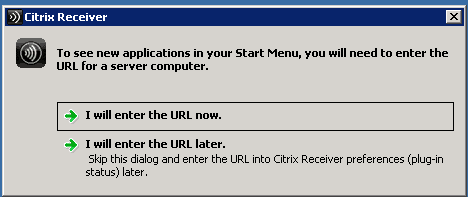
Once the reboot has completed you may be prompted with the Citrix Receier url
After that there is the first Configure and run discovery process for the new Administrator GUI, called Citrix Delivery Services Console.